


Portable Water Dispenser is now one of the more commonly used household appliance
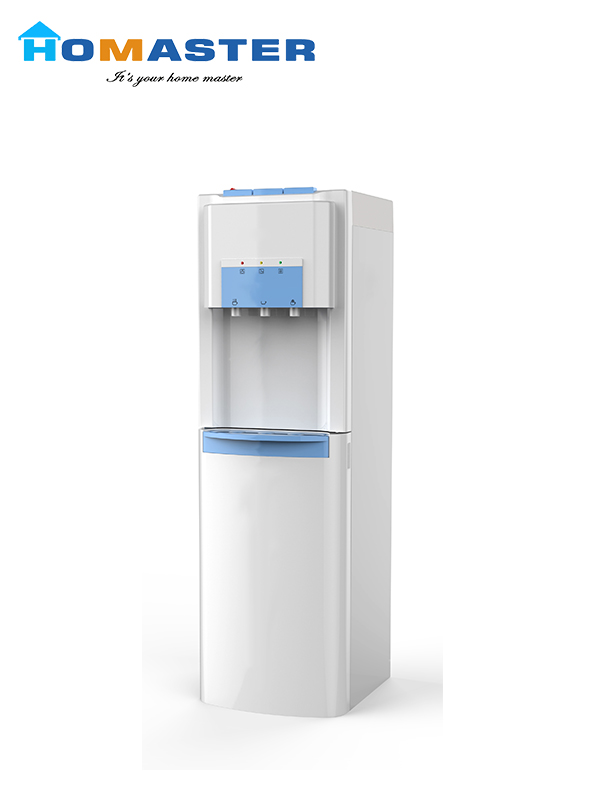
s. Whether it is office workers, travel parties, dormitory parties, or moms, it is very convenient to use drinking water, and it is also the correct way to open drinking water, but how to buy it Woolen cloth? You need to know more about the product. There are many brands of Portable Water Dispenser, and their functional characteristics meet your needs. So, let's take a look at how to choose Portable Water Dispenser? Here are some answers.
Here is the content list:
The appearance style of Portable Water Dispenser.
Water intake of Portable Water Dispenser.
Portable Water Dispenser heating time.
The temperature range of Portable Water Dispenser.
The detailed design of Portable Water Dispenser.
Traditional water Dispenserrs are relatively bulky and inconvenient to use. So when you buy Portable Water Dispenser, choose a water Dispenserr with a compact appearance. For example, HOMASTER Portable Water Dispenser has a simple design, is small in size, does not occupy space during use, and looks more beautiful.
The main function of a Portable Water Dispenser is to provide hot water. When purchasing, you must also consider its water intake and capacity. The Portable Water Dispenser that can only be used with a single water intake has a lot of inconveniences. Therefore, the Portable Water Dispenser with multiple water inlet methods is more convenient to use, whether it is used by one person or by multiple people, it can meet the drinking water needs.
Many people want to drink hot water right away when they drink water, so when choosing Portable Water Dispenser, they must choose Portable Water Dispenser with an instant heating function. Hot water is produced in 3 seconds, and there is no need to drink water. Wait and heat up quickly, making it more convenient to use.
When everyone chooses Portable Water Dispenser, try to choose the Portable Water Dispenser with multi-level adjustment. Because you usually need to make milk, tea, coffee, or warm water to use hot water, these water scenarios have different choices of water temperature, so you should choose the Portable Water Dispenser with multi-stage adjustment.
In addition to the essential functions of Portable Water Dispenser, it is also necessary to consider whether some detailed designs of Portable Water Dispenser are in place, such as whether the button design of Portable Water Dispenser and the body design conform to ergonomics. There are also detailed designs such as whether the Portable Water Dispenser is stable when placed on the desktop and whether it has a child lock protection function.
For more questions about Portable Water Dispenser, please contact HOMASTER. Years of accumulated R&D and production experience will provide you with more product services and technical support! Our official website is https://www.homaster.com/.
Water is the source of life, 70% of the human body is composed of water, which
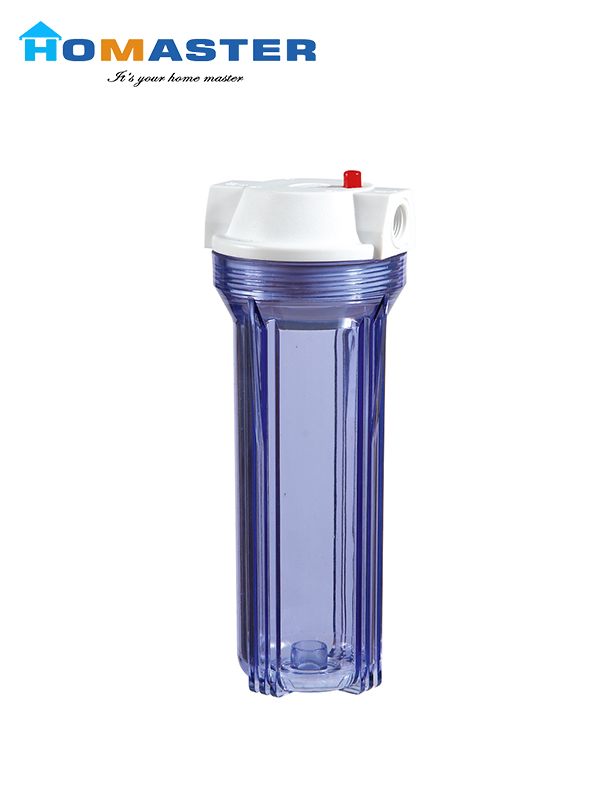
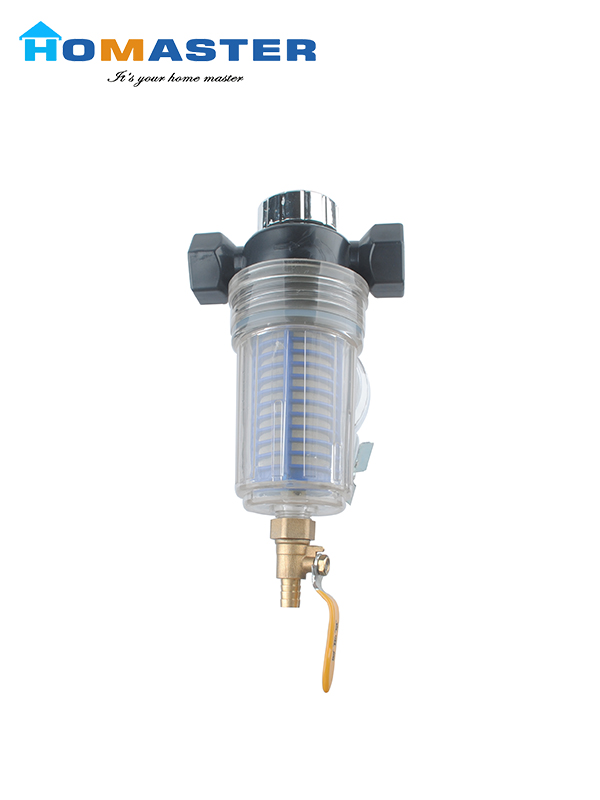
 shows the importance of water. With the improvement of living standards, Water Dispenser gradually enters public life. For the sake of health, Water Dispenser should be cleaned regularly. So, let's take a look at the cleaning steps of the Water Dispenser. Here are some answers.
Here is the content list:
l Step 1: Cut off the power and take out the water bottle.
l Step 2: Clean the exterior of the Water Dispenser.
l Step 3: Clean the inside of the Water Dispenser.
l Step 4: Clean the Water Dispenser faucet.
Unplug the power plug of the Water Dispenser first, and then remove the bottle. Make sure that no other electrical appliances are connected to the same socket, and remove the electrical appliances around the Water Dispenser. In case of leakage of water and electricity, it will cause an electric shock, so be careful.
Use a clean cloth dipped in detergent and carefully wipe the entire body, including the sink and storage cabinet. These parts of the Water Dispenserare prone to accumulate bacteria due to direct contact with the air. Scrubbing removes the dirt from them and prepares them for the next step of disinfection.
First, drain all the water in the Water Dispenser, and then remove the smart seat on the Water Dispenser. Then pour the pure water into the water storage tank, clean the water storage tank, turn on the faucet, and drain all the dirty water in the water tank. Secondly, wipe the water reservoir carefully with a clean rag and then rinse it twice with water. Thirdly, pour 600 ml of the special cleaning and disinfection solution into the reservoir. 10 minutes later, turn on the red and green taps until the disinfectant is used up. Then rinse several times with boiling or pure water.
Dip cotton with alcohol, and gently scrub the back wall and underside of the faucet. When you use a cup to hold water, it is easy to touch the back wall and below the Water Dispenser switch, so you can't just wipe it with a rag.
Cleaning the Water Dispenser with an ozone machine.
Ozone sterilization for Water Dispenser cleaning is also a recommended method of Water Dispenser cleaning. This Water Dispenser cleaning method uses the germicidal effect of ozone to achieve the purpose of cleaning the dispenser. When cleaning, after emptying the machine of the remaining water, dock the interface of the disinfection machine and the Water Dispenser's water inlet, inject the ozone into the Water Dispenser liner and after about 20 minutes of fumigation, fill the water bucket and release a small amount of water. As ozone has a half-life of 20-50 minutes at room temperature, it can all be decomposed within a few hours and oxidized into harmless oxygen, water, and carbon dioxide. After the ozone sterilization cleaning, you can drink safe water within an hour or two.
If you want to buy Water Dispenser, you can communicate with us on the website. Our official website is https://www.homaster.com/.
There are many types of Water Purifiers, such as water softeners, direct drinking ma
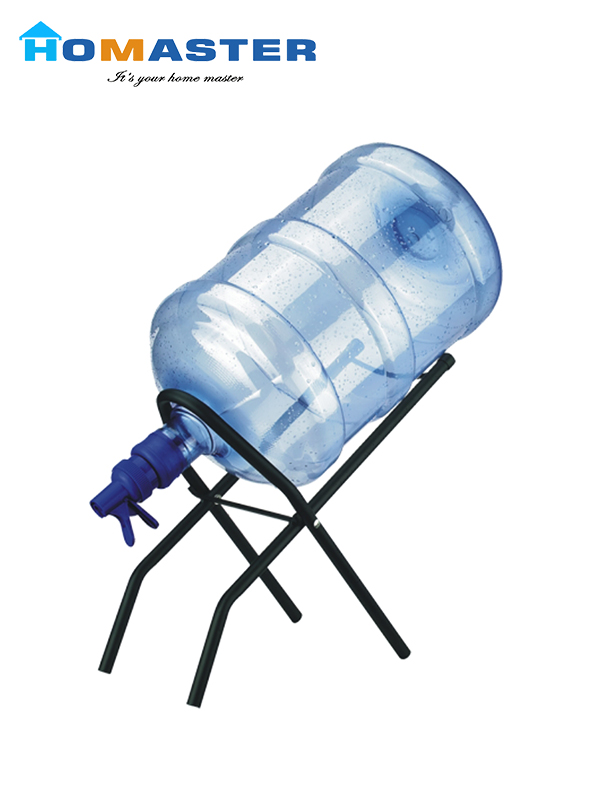
chines, pure water machines, and so on. Different Water Purifier installation methods are not the same, but the installation of Water Purifiers generally has to go through several similar steps. Next, the installation steps of the Water Purifier will be introduced in detail. Here are some answers.
Here is the content list:
Install Water Purifier accessories
Install Water Purifier host
Connect the water inlet tee
Connect water inlet, water outlet, sewage outlet
Flushing and debugging
Before installation, check whether the accessories are complete, and check whether all the pipelines, joints, faucets, and other water fittings of the Water Purifier are complete. Unpack the products that need to be assembled on-site and assemble them. Some Water Purifiers need to install special faucets, such as Water Purifiers and direct drinking machines. Some Water Purifier and softener are not required. The water purification faucet is mostly a gooseneck faucet, which is generally installed on the conditioning table of the kitchen and needs to be installed with holes.
When installing the water purifier, insert the unpacked RO membrane with two black "O" rings into the RO membrane tube until it feels inserted to the end, and then tighten the RO membrane tube end cap. Then remove the RO membrane pipe inlet PE pipe and place it in a container, turn on the water source and turn on the power of the Water Purifier, fill the first three pre-treatment filter housings with water, and let the black pre-filtered water flow out. After the black water has run out, turn off the power of the Water Purifier, and then install the removed RO membrane pipe into the water PE pipe.
After the Water Purifier host is installed, connect the water inlet tee next. Turn off the main tap water switch, wrap the threaded inlet of the ball valve with raw material tape several times, and then directly connect the PE pipe to the side hole of the water inlet tee, and connect the PE pipe to the outlet of the ball valve.
Measure the distance and cut out the PE pipe, connect the water inlet tee to the PE pipe and then connect to the water inlet of the Water Purifier. Connect the PE pipe to the water inlet of the host, and the water inlet of the integrated machine and box-type water purifier is located on the outside of the machine. Connect the PE pipe to the post-activated carbon, here is the water outlet. When connecting the sewage outlet, the connection pipe is here, and it can be opened once a month for 10 minutes at a time.
Then turn on the Water Purifier switch and let the water in for 20 minutes to rinse. Some black water will wash out. This is normal. This is a small amount of activated carbon powder. Don't drink the water for the first time or two. Put in the water a few times, and the water quality will be more stable. You can drink it straight away.
For more Water Purifier related questions, please consult HOMASTER. Our official website is https://www.homaster.com/.
Water Bottle Shelf is very common in our daily life, and it is also a very commonly used item. For example, you can see Water Bottle Shelf in our homes, living rooms, and offices in the company. It seems to be everywhere. Next, let's take a look at the description and structure of the Water Bottle Shelf. Here are some answers.
Here is the content list:
Description of Water Bottle Shelf.
The structure of the Water Bottle Shelf.
Floor Water Bottle Shelf refers to the Water Bottle Shelf placed on the ground, mostly in the corner of the wall. Don't look at the wall, but the cabinet is easy to get damp, and the sanitation underneath is not easy to clean.
Water Bottle Shelf is very suitable for any outdoor or indoor use, such as home, kitchen, office, etc. Its maintenance cost is low, and you can reuse the same Water Bottle Shelf continuously for many years. Water Bottle Shelf is a dual-purpose bottle rack for home and office. It has the advantages of slimness, comfort, and stability. Its color is generally silver or blue, suitable for 3 and 5-gallon bottles (11 and 18.9 liters), they are easy to assemble, have no tools, and are very convenient.
Under normal circumstances, as long as it is still usable and does not conflict with the color of our water bottle, we may not consider replacing it with a new Water Bottle Shelf for a long time. However, when you plan to replace or add a new Water Bottle Shelf, you may be confused by the Water Bottle Shelf of various shapes and materials.
The mainstream materials of the Water Bottle Shelf are divided into three types: carbon fiber, plastic steel, and aluminum alloy. It is necessary to choose a suitable Water Bottle Shelf according to your water bottle. After all, an inappropriate Water Bottle Shelf will increase your worries. The Bottle Shelf structure includes a fixed seat plate with a substantially straight edge and two clamping parts extending outward from the top end of the fixed seat plate. The two clamping parts are in an arc shape, and the two arc-shaped frames enclose a nearly circular accommodating space. Accordingly, it is possible to achieve a smaller proportion of unit area with less material loss, reduce material costs, and meet the needs of lighter and fixed kettles, and its support is more stable and better.
For more questions about Water Bottle Shelf, please consult HOMASTER. Years of accumulated R&D and production experience will provide you with more product services and technical support! Our official website is https://www.homaster.com/. We uphold the spirit of integrity, professionalism, and innovation, win trust with quality and achieve the future with brand. Our company adheres to the corporate culture of "quality first, customer first", and has always made unremitting efforts to become a professional Water Bottle Shelf supplier in the industry.